Video Server, Part 3: Encoding
This is the third in a series of articles that will detail the tools and methods I’m using for my personal media server at home. Part 3: Encoding gets to the meat of the matter, and finally addresses how to turn the DVD into a video file. Future articles will detail converting, integration and disaster management.
Encoding is where all magic happens. The data on the DVD is finally converted to a standalone file to be used in other applications. This is also where most of the confusion lay, where incompatibilities creep in, and where most of the time is spent waiting for the computer to finish something. This time spent waiting is also what makes trial and error such a bitch; depending on your setup, you may have to wait as long as four hours to find out if the file you generated is any good, or if it will work in with your chosen application.
Right up front, let me say that I’m no expert on this subject. I had one goal: decent quality movies at a reasonable size that worked in iTunes. There are a ton of videophiles out there who argue about this codec or that codec, and Dolby digital sound vs. whatever regular old sound is called, but when it comes down to it, I’m interested in convenience and watchability above all else. That being said, though, this method produces a file that’s indistinguishable from DVD, at least to my eyes.
One more caveat, before I delve into the minutiae. I’m going to go through all of the options I set for encoding, but there are a number of places where I didn’t make a conscious decision to do it one way or the other, and I don’t know if changing it will make any difference. For example, in one case I turn auto-cropping on, because I suspected that leaving it off would give me black bars along the top and bottom of my image. I never tried changing it, though, because the settings I’m using give me the results I want.
I played around with a number of different packages on both Mac and PC before I finally ended up using Handbrake v0.9.0 on the PC, a free, open-source, cross-platform package that used to be exclusively for the Mac, but eventually went both ways. It’s not super-fast, but it produces an excellent quality video and is fully operational from the command line; in fact, from what I can tell the GUI is just tacked on to make it easier to build the command line parameter list. In the interest of gratuitous multi-media, however, I’m going to go through configuration using the GUI before recommending you abandon it altogether.
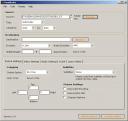
Step 1: Choose your source directory.
The first step, once you start the program, is to choose the directory where you stored your DVD rip. You can find more information on ripping in Part 2 of this series. This example is based on where the files would be after following that tutorial, or F:\FullDisc\JURASSICDTS\VIDEO_TS\.
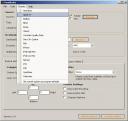
Step 2: Choose AppleTV from the presets:
From the menu bar, choose AppleTV from the preset menu. This will set a number of options.
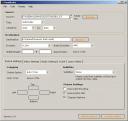
Step 3: Choose the destination and cropping options.
When you specify the destination file through the Browse menu, Handbrake will automatically change the file extension to .m4v, the default file extension for Apple’s movie files. Since a number of my post-encoding scripts were written to use .mp4 files, and I have hundreds of other files with that extension, I change it back to .mp4. This seems to work fine. Under the “Picture Settings” tab, set Cropping to “Auto Cropping”.
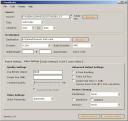
Step 4: Change the bitrate.
Change to the “Video Settings” tab and change the bitrate to 1024. I’ve found this bitrate produces excellent results and a file size of around a Gig for most movies. As far as I know, the value 1024 has no special meaning in this context- it just seemed computer-y.
Step 5: Ditch the GUI.
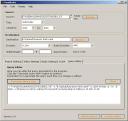
The last tab, “Query Editor”, has button labeled “Generate Query Now”, which will give you the command line options based on your settings. I recommend you copy this text and run Handbrake from the command line:
C:\Program Files\Handbrake\hbcli.exe -i "F:\FullDisc\JURASSICDTS\VIDEO_TS" -o "E:\Upload\Jurassic Park.mp4" -e x264 -E faac -p -m -b 1024 -x bframes=3:ref=1:subme=5:me=umh:no-fast-pskip=1:trellis=2 -B 160 -R 48
… or, if you’re running Cygwin, which I also recommend:
/cygdrive/c/Program\ Files/Handbrake/hbcli.exe -i "F:\FullDisc\JURASSICDTS\VIDEO_TS" -o "E:\Upload\Jurassic Park.mp4" -e x264 -E faac -p -m -b 1024 -x bframes=3:ref=1:subme=5:me=umh:no-fast-pskip=1:trellis=2 -B 160 -R 48
At this point you’ve got a nice file that you can drag into iTunes and watch on your AppleTV. A word of caution, though: on my machine, this process will occasionally fail with a segmentation fault after two to four DVDs. Rebooting and restarting the process works for me.
In the next entry in this series, I will go deal with converting existing files into MP4 files, mostly for dealing with downloaded TV Shows, and after that I will address adding meta-data, such as artwork and plot descriptions, to make your videos pretty. Stay tuned for that- there will be scripts.
