Video Server, Part 4: Converting
Monday, September 24th, 2007This is Part Four of my series on building a video server using Apple’s iTunes/AppleTV combination. This article details the process of converting existing video files to a compatible format.
When I initially started this whole video thing, my goal was to get video on my iPod, so naturally one of the applications I came across when I was searching for tools to convert my collection of .avi files was the Videora iPod Converter by Red Kawa (v2.25). Though billed as an iPod converter, this front-end for ffmpeg allows you to set the output values to almost anything, making it ideal for converting an existing .avi file to any flavor of .mp4 you’d like.
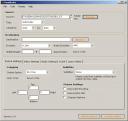
At first I was put off by the ad-thick interface and the hideous design, but once I got past that I found a fairly full featured, functional application. Day to day usage is trivial, as the program is built around a “One-Click” queue that functions pretty much as intended, but getting it configured took a bit of work.
Step 1: Set the Video Output Folders.
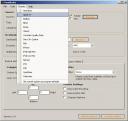
After you start the program, choose “Settings” from the menu at the top of the screen. Chose “Devices” from the tabs menu that appears, then “iPod” from Device Settings. You have two fields for Video Output Folders: MPEG-4 Videos and H.264 Videos. I don’t know which is which, so I set both of them.
Step 2: Set the Encoding Profile and One-Click settings.
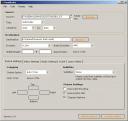
Change the tab from “Devices” to “Converter”. In the “Encoding Profiles” box, set Device to iPod, and Profile to “H.264 VGA 1024 kbps Stereo/160kbps”. In the “One-Click” box, set “Device” and “Profile”. I also set “Process Priority” to “High”, but this is the only thing I use this computer for.
Step 3: Edit Profile, set General Properties.
Click on “Edit Profile”. Leave Name set to “H.264 VGA 1024 kbps Stereo/160kbps”, and change Encoder to “AppleTV 1-Pass – FFmpeg MINB”, if it’s not already set.
Step 4: Edit Profile, set Video Properties.
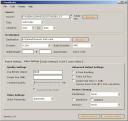
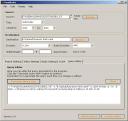
Click the “Video” option in the menu, and set the options as they appear in Fig 4. For the most part, I prefer to leave the resolution and aspect ratio alone, and make sure Auto Resize is not enabled. However, do make sure to set the Framerate value to “29.97”. A number of applications and hardware decoders can be touchy about this value.
Step 5: Edit profile, set Audio Properties.
Click the “Audio” icon in the top menu, and compare the settings to Fig 5. To be perfectly honest, I don’t remember whether or not I changed any of the defaults, or if they matter.
Step 6: Convert.
Once the profile has been configured, converting is a breeze. In the top menu click “Convert” and choose the “Current Conversion” tab. Click the “One-Click Convert” button to choose a list of .avi files. They will automatically be added to the queue and conversion will begin immediately. Completed files will be dropped in the Video Output Folders defined in Step 1, and should be fully iTunes compatible.
Your mileage will vary, of course, but my conversions are usually a tad faster than realtime. A 42 minute file, for example, will usually take 30 to 40 minutes to complete, and the quality, while not stellar, is adequate. There are likely a number of places where this could be improved.
In the next article in this series, I will present the scripts and techniques I use to add meta-data to the video files, including plot descriptions, artwork and ratings.


